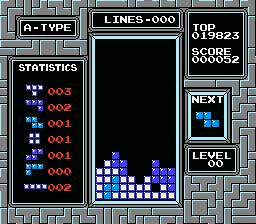
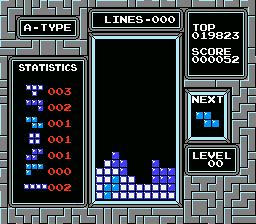
by dropping a piece
across the floor of the well
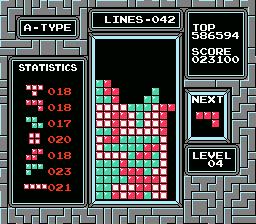
If you saw my NES page, you know that Tetris is one
of my favorite video games. In fact, almost everyone has played some
version of Tetris. The information on this page is concerned mainly
with the original, Old School (surprise, surprise) version of this game.
There are many, many variations of Tetris, including 3D Tetris, Tetris
based on different shapes, with bombs, or color-matching rules, and
which bear little resemblance to the original game. To me, what makes
Tetris such a great game is that success depends on combining fast thinking
and fast reflexes, as opposed to RPG's where you buy some potion from a
gnome, or the mindless (if quite satisfying) shoot-em-up carnage of the
many games shrilly decried by the some as the cause of the downfall of
Western Civilization (boy if I had a super-vaporizing-laser with neutron
enhancements I'd show those folks that video game violence doesn't cause
real-life violence).
Some people might think Tetris is too easy or boring
because of its simplicity. Tetris is indeed easy to learn, and even
neophytes can get through several levels on their first try. However,
truly mastering the game is as difficult as almost any game, and despite
its simple rules, maximizing your score depends on mastery of a variety
of strategy and tactics, and using those strategies even as the pieces
drop at faster rates.
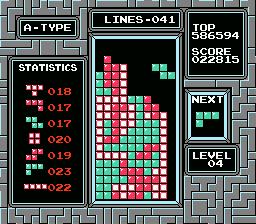
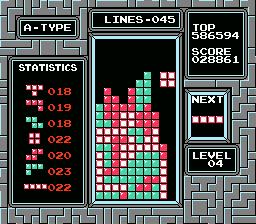
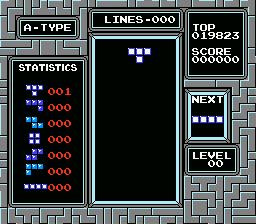
Throughout this strategy guide, I will be using screen shots and advice particularly suited to Nintendo 8-bit Tetris from 1989. The basic version of Tetris varies mostly in the scoring system. In most versions, tetrises (clearing four lines at once with a straight piece) are worth many more points. Nintendo Tetris is my favorite version in part because adopting the risky strategy of building stacks for tetrises is the only way to get a really high score. This is because a Tetris is worth 4 times as many points as a triple, which is worth 3 times as much as a double, which is worth 2.5 times as much as a single line (example: A level 9 tetris is worth 12000 points, a triple 3000, a double 1000, and a single line only 400 points). Keeping the stack low and playing for single lines is very easy, and gets boring, but playing for points is much more difficult and interesting. Consequently, the focus of this guide will be on the tetris-building, point-scoring strategy, not the line-clearing method, which is fairly self-explanatory.
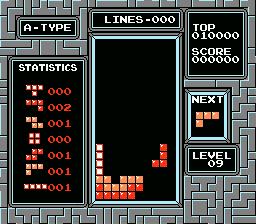
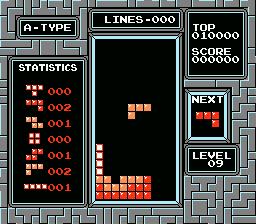
Basic Rules: Most people are familiar with how to play Tetris, so
I'll only give a general description here
Rule 1: Rotate different shaped pieces as they fall in the well
Rule 2: Use the pieces to complete horizontal lines which disappear
when complete
Rule 3: Don't let the playing well fill with pieces and incomplete
lines
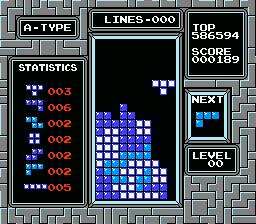
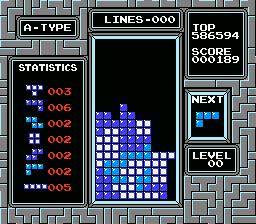
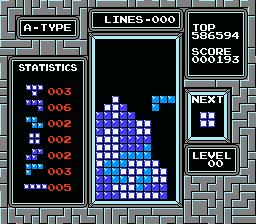
Basic Piece Manipulation
|
|
| Situation - a hole in the stack that can't be filled
by dropping a piece |
Solution - slide the piece to the left to fill the hole
across the floor of the well |
Advanced Building Strategy
There are two key rules to follow when playing Tetris at higher levels
for higher scores:
1.
Have a spot for every possible piece - an ill-fitting piece
can destroy an opportunity for a tetris, or ruin an entire game.
Your goal should be to avoid situations when you can't fit a piece whenever
possible. This is mainly achieved by effective design of your stack.
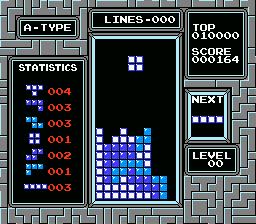
Examples of bad stacks:
A.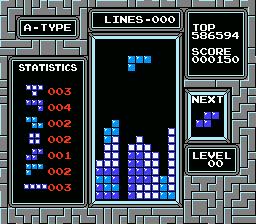
This is probably the worst possible stack formation. There are
three gaps that can only be filled with a straight piece. The analog
to the rule that you should have a spot for every piece is that you should
not have gaps like this that can only be filled by one piece.
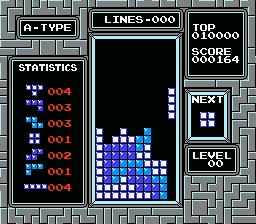
B.
A good stack needs some flat space to accomodate
squares. There are no spaces like that here (a reverse-L piece similarly
can't be fit in here).
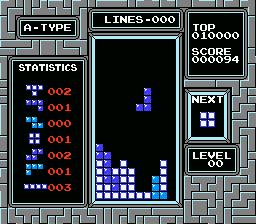
C.
This stack has the same problem as shot (A), in
that only straight pieces will fit in two different gaps. However,
the big problem with this stack, is that the higher part of the stack is
adjacent to the gap. As you will see from all of the examples of
good technique, the higher side of the stack should be against the well's
wall, and the lower side by the tetris gap, since this will allow you to
dispose of pieces and manage your stack height much easier, without depending
on straight pieces to bail you out.
So what does a good stack look like?
Even though this stack is the highest example so far, it is also the
ideal formation. In terms of score maximization, two straight pieces
will result in two tetrises. Every piece except for the z-zigzag
can be fit on top of the stack. Similarly, six pieces can reduce
the stack level in addition to the straight piece. The following
examples show the importance of building higher against the wall: more
options for every piece.
 |
 |
 |
 |
| Drop the s-piece down the right side of the screen | Two lines are erased, and the stack integrity retained | Here's how the z can fit | This works well at high levels when you may not have time to fit the piece in better locations |
 |
 |
 |
 |
| Drop the square into the gap | Two lines gone, the stack is lowered | The t doesn't look like it will fit, but... | one line is gone without a gap |
 |
 |
 |
 |
| Need to reduce the stack? Drop the L like this. | Three lines gone, stack is the same | Even the reverse L can work | this is a good way to build a stack to tetris height if a straight is the next piece |
Sometimes you need to be inventive when placing pieces to clear lines.
Look at the following examples:
 |
 |
| This doesn't look like it will work, but... | The line is cleared, and the stack is basically the same |
 |
 |
| Once again, a bit unorthodox... | But it still works (notice that other options for the L included clearing 3 lines and eliminating the possibility for a tetris, stacking it vertically, which wouldn't have left any space for the square, without covering the tetris gap). There is one other way you could have placed the L, while leaving space for the square and the opportunity for a Tetris, involving turning it counter-clockwise left. See if you can figure out where to place it this way. |
2.
The most important general rule to follow when playing is to know
where you will put the next piece, while the current piece is falling.
If you aren't using the "next" window on lower levels, you won't be able
to play effectively on the lower levels, and the pieces will fall too fast
on the higher levels for you to play at all. On the fastest levels,
if you wait until the next piece is on the screen, it's often too late
to place it where you want it.
Here are two basic examples:
A.
 |
 |
| There are two possible fits for the square, but a straight piece is next | If you put the square on the side, the stack is at tetris height. A fairly obvious application, but you always want to turn straight pieces into tetrises |
B.
 |
 |
| There are several possible places to put the reverse-L, but one is much better than the others | Placing it in this position leaves no place for the square without creating an unfillable hole |
 |
 |
| Flipping the reverse-L upside-down will create a space for the square, but now you need two straight pieces to fill the two large gaps | Flipping the reverse-L and using it to cap the straight piece on the right will provide the best place for the square, while still accomodating the next piece. |
Advanced Piece Manipulation Strategy
Many versions of Tetris have two different piece rotation keys or buttons;
one rotates the piece clockwise, the other counter-clockwise. You
might wonder why you would ever need to rotate a piece in different directions,
or why it should matter what rotation direction you use. Normally,
it doesn't matter that much, but you should learn when to use the opposite
rotation key/button, and how you should use rotation direction in your
strategy.
Here are the reasons why different rotation directions matter:
1. For the majority of rotations, one rotation direction can
and should be used. There are three special cases when the other
direction should be used; in cases where a piece can be rotated in three
or four ways. The square, for instance, can't be rotated. The
straight, the s-zigzag, and the z-zigzag can be rotated once. For
these pieces, rotation direction makes no difference, and you should consistently
use the same direction to eliminate confusion. The L, reverse-L and
the T can be rotated in four ways. Look at the following diagrams
to see when you should rotate in the opposite direction (All assume that
clockwise is the primary rotation direction used).
A.
 |
 |
 |
 |
| A | B | C | D |
B.
 |
 |
 |
 |
| A | B | C | D |
C.
 |
 |
 |
 |
| A | B | C | D |
The three examples detailed above are the only times you need to use the opposite rotation direction. In the examples above, with a low-speed level, and an empty well, it doesn't really matter which rotation you use. However, if the stack is high, and the dropping speed is faster, as it often will be, you may only have time to rotate the piece once, and if you don't make the correct rotation, the failure could be catastrophic to your game.
2. Stack placement:
If you use the clockwise rotation button most of the time, build your
stack on the left (leave the hole for the straight piece on the right).
For counter-clockwise dominant players, stack on the right with the hole
on the left. The reason why is difficult to explain clearly, but
basically, if you stack on the right, and rotate clockwise, you are rotating
the piece towards the stack, which in effect, leaves you less time to get
any piece, specifically the long straight piece, into the hole.
 |
 |
 |
| Here's a stack on the right, with a straight piece | Rotated clockwise, there is just barely enough time and clearance. With a higher level speed or stack height, it would not have been possible to get the straight to the hole, and the game would be lost as the stack would be too high to move another piece to the hole to complete a line | Rotated counter-clockwise, the piece is one space further over, with an extra line of clearance (Notice the top of the straight is actually off the screen). This extra space can make the difference at a high level |
3. The T-trick
This trick is somewhat difficult, but it is also the most impressive
example of opposite-rotation strategy.
 |
 |
| It doesn't look possible to fill the gap with this piece | First, turn the piece clockwise and drop into the gap |
 |
 |
| Drop the T all the way into the gap | Before the piece is fixed in place, rotate it counter-clockwise. The T will rotate through the gap to its original position to fill the hole and erase the line |
If you've read through this whole tutorial, you are probably more than a casual player and well on your way to Tetris mastery. I hope the strategies I described here can help provide the finishing touches to a Tetris master's game.