With the early revision A500 resurrected again, it soon become obvious that there were more things to fix on it. One of the first things I noticed was that the keyboard was in need of repair. For one thing it was disgusting looking, with dirt and grime all over, and someone had used a pencil to draw crosses on most of the keys for whatever reason. But more importantly, some of the keys didn’t seem to work.
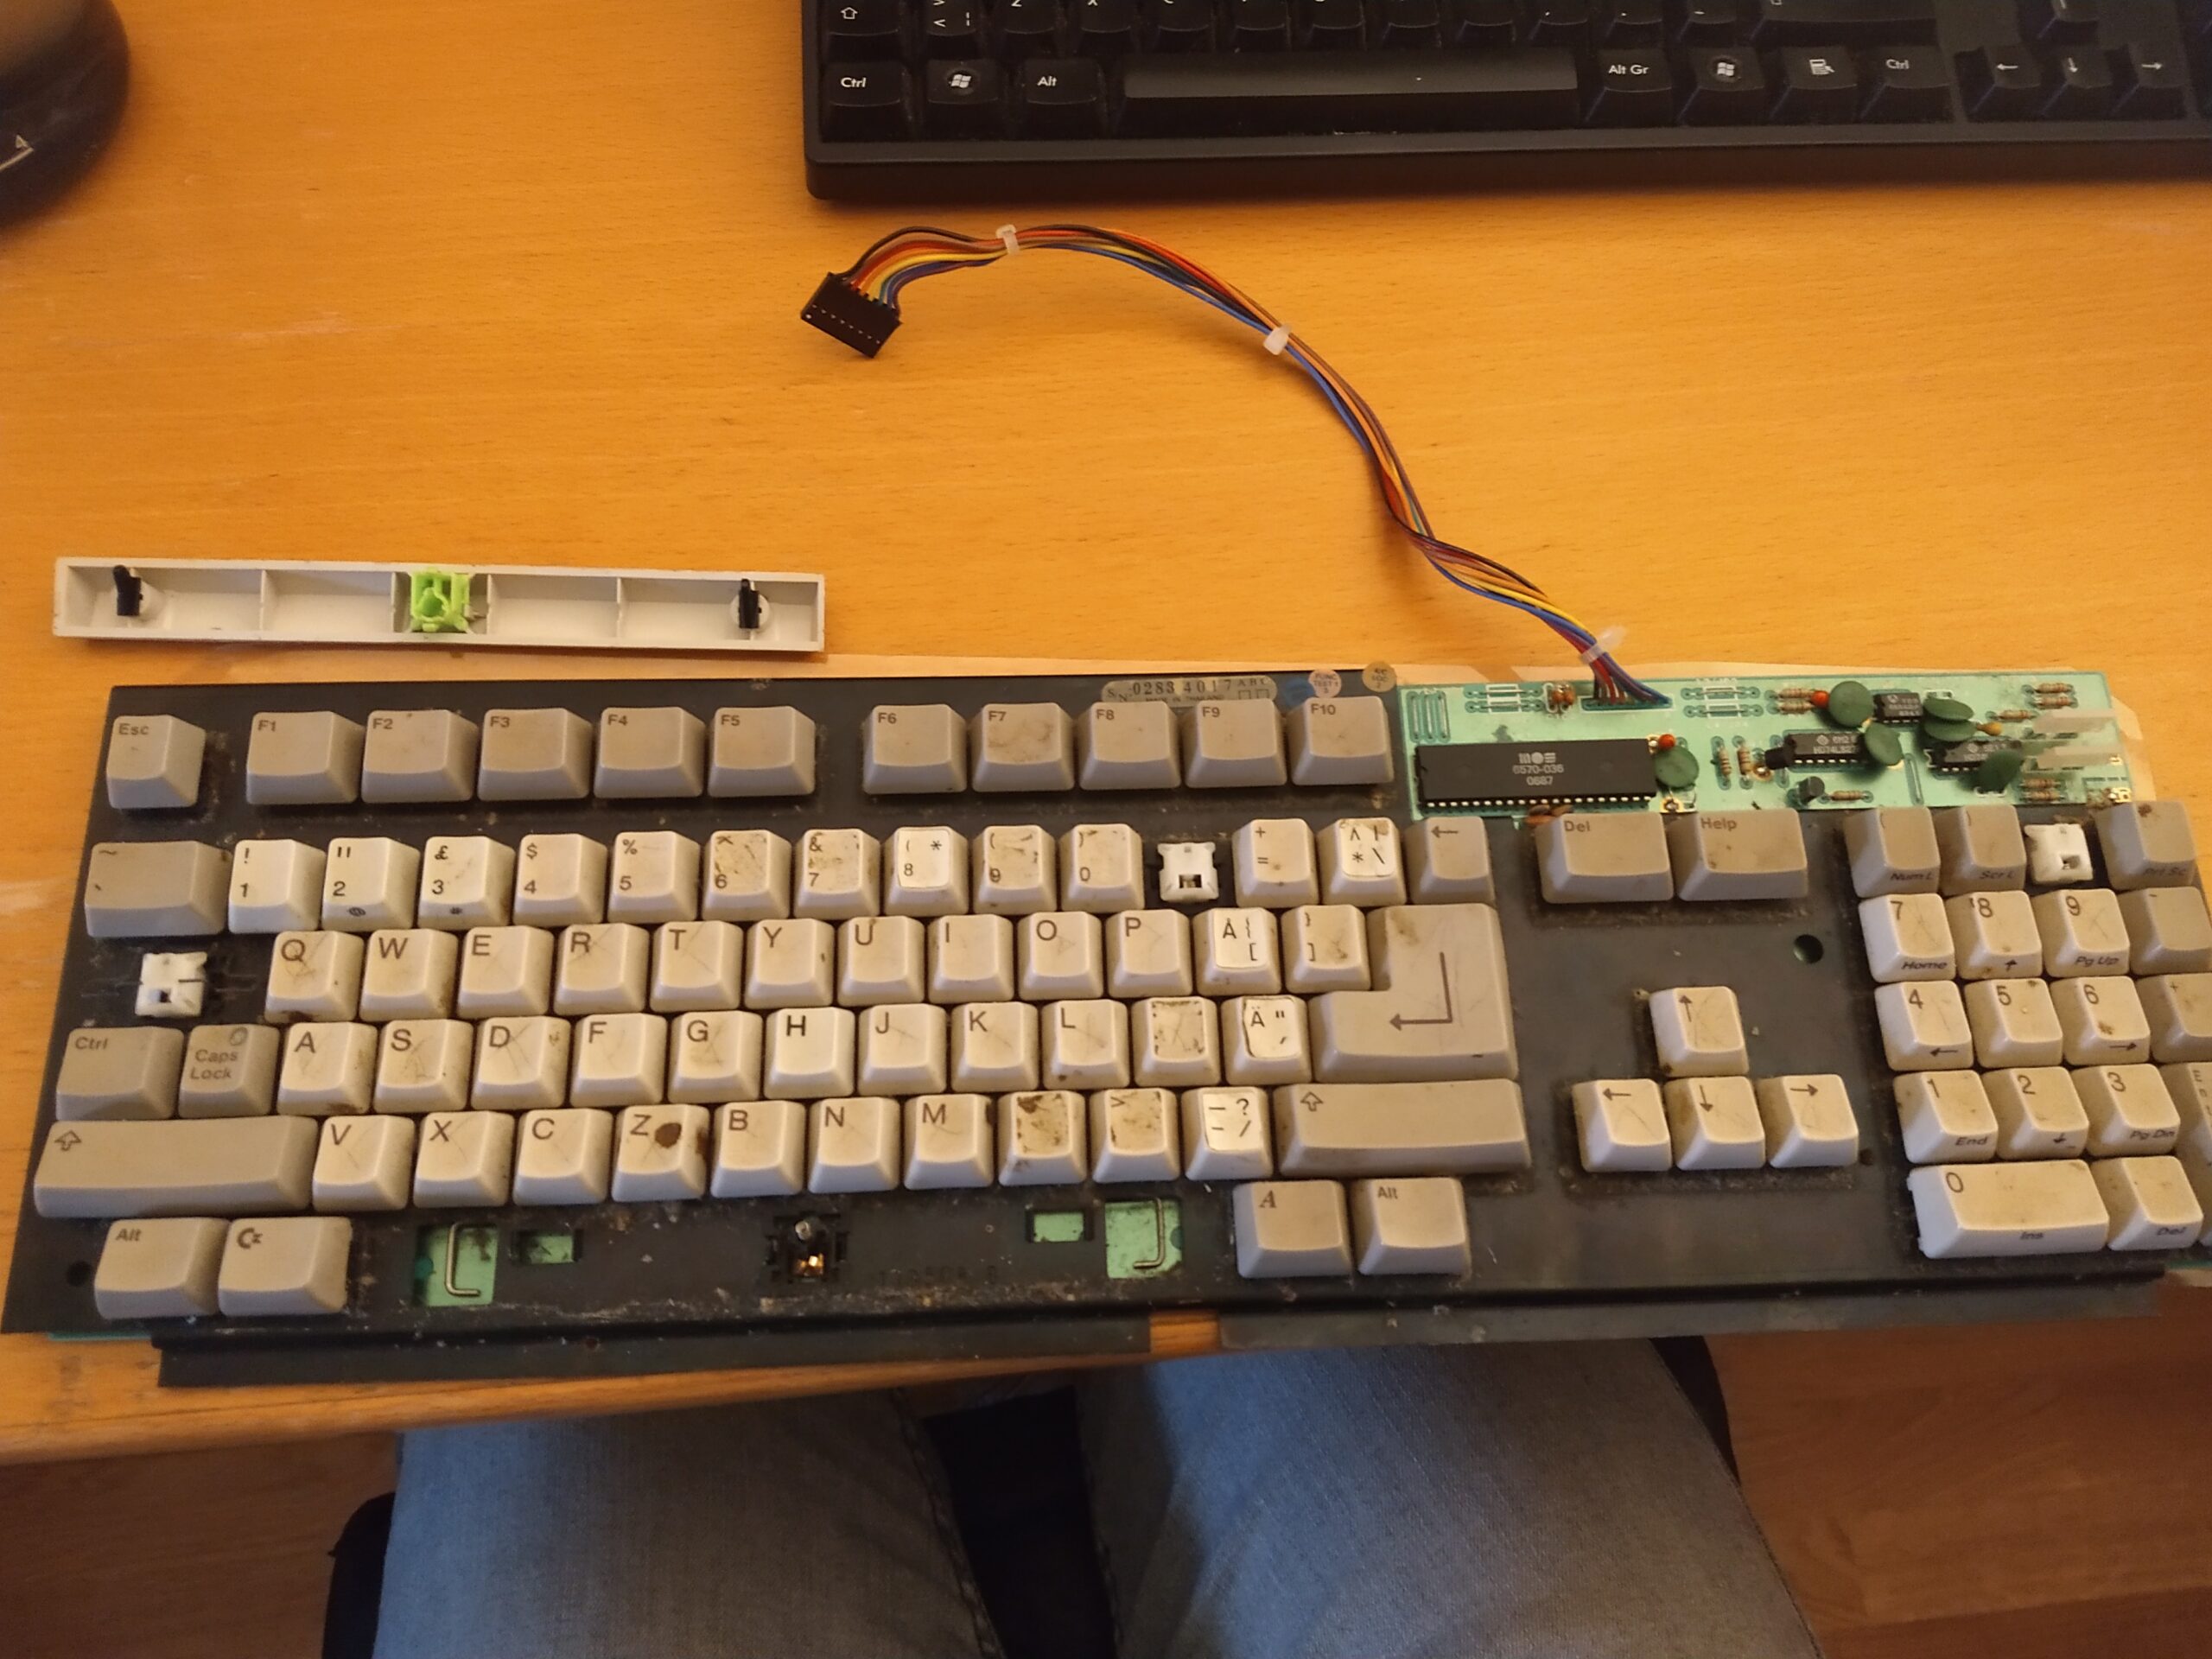
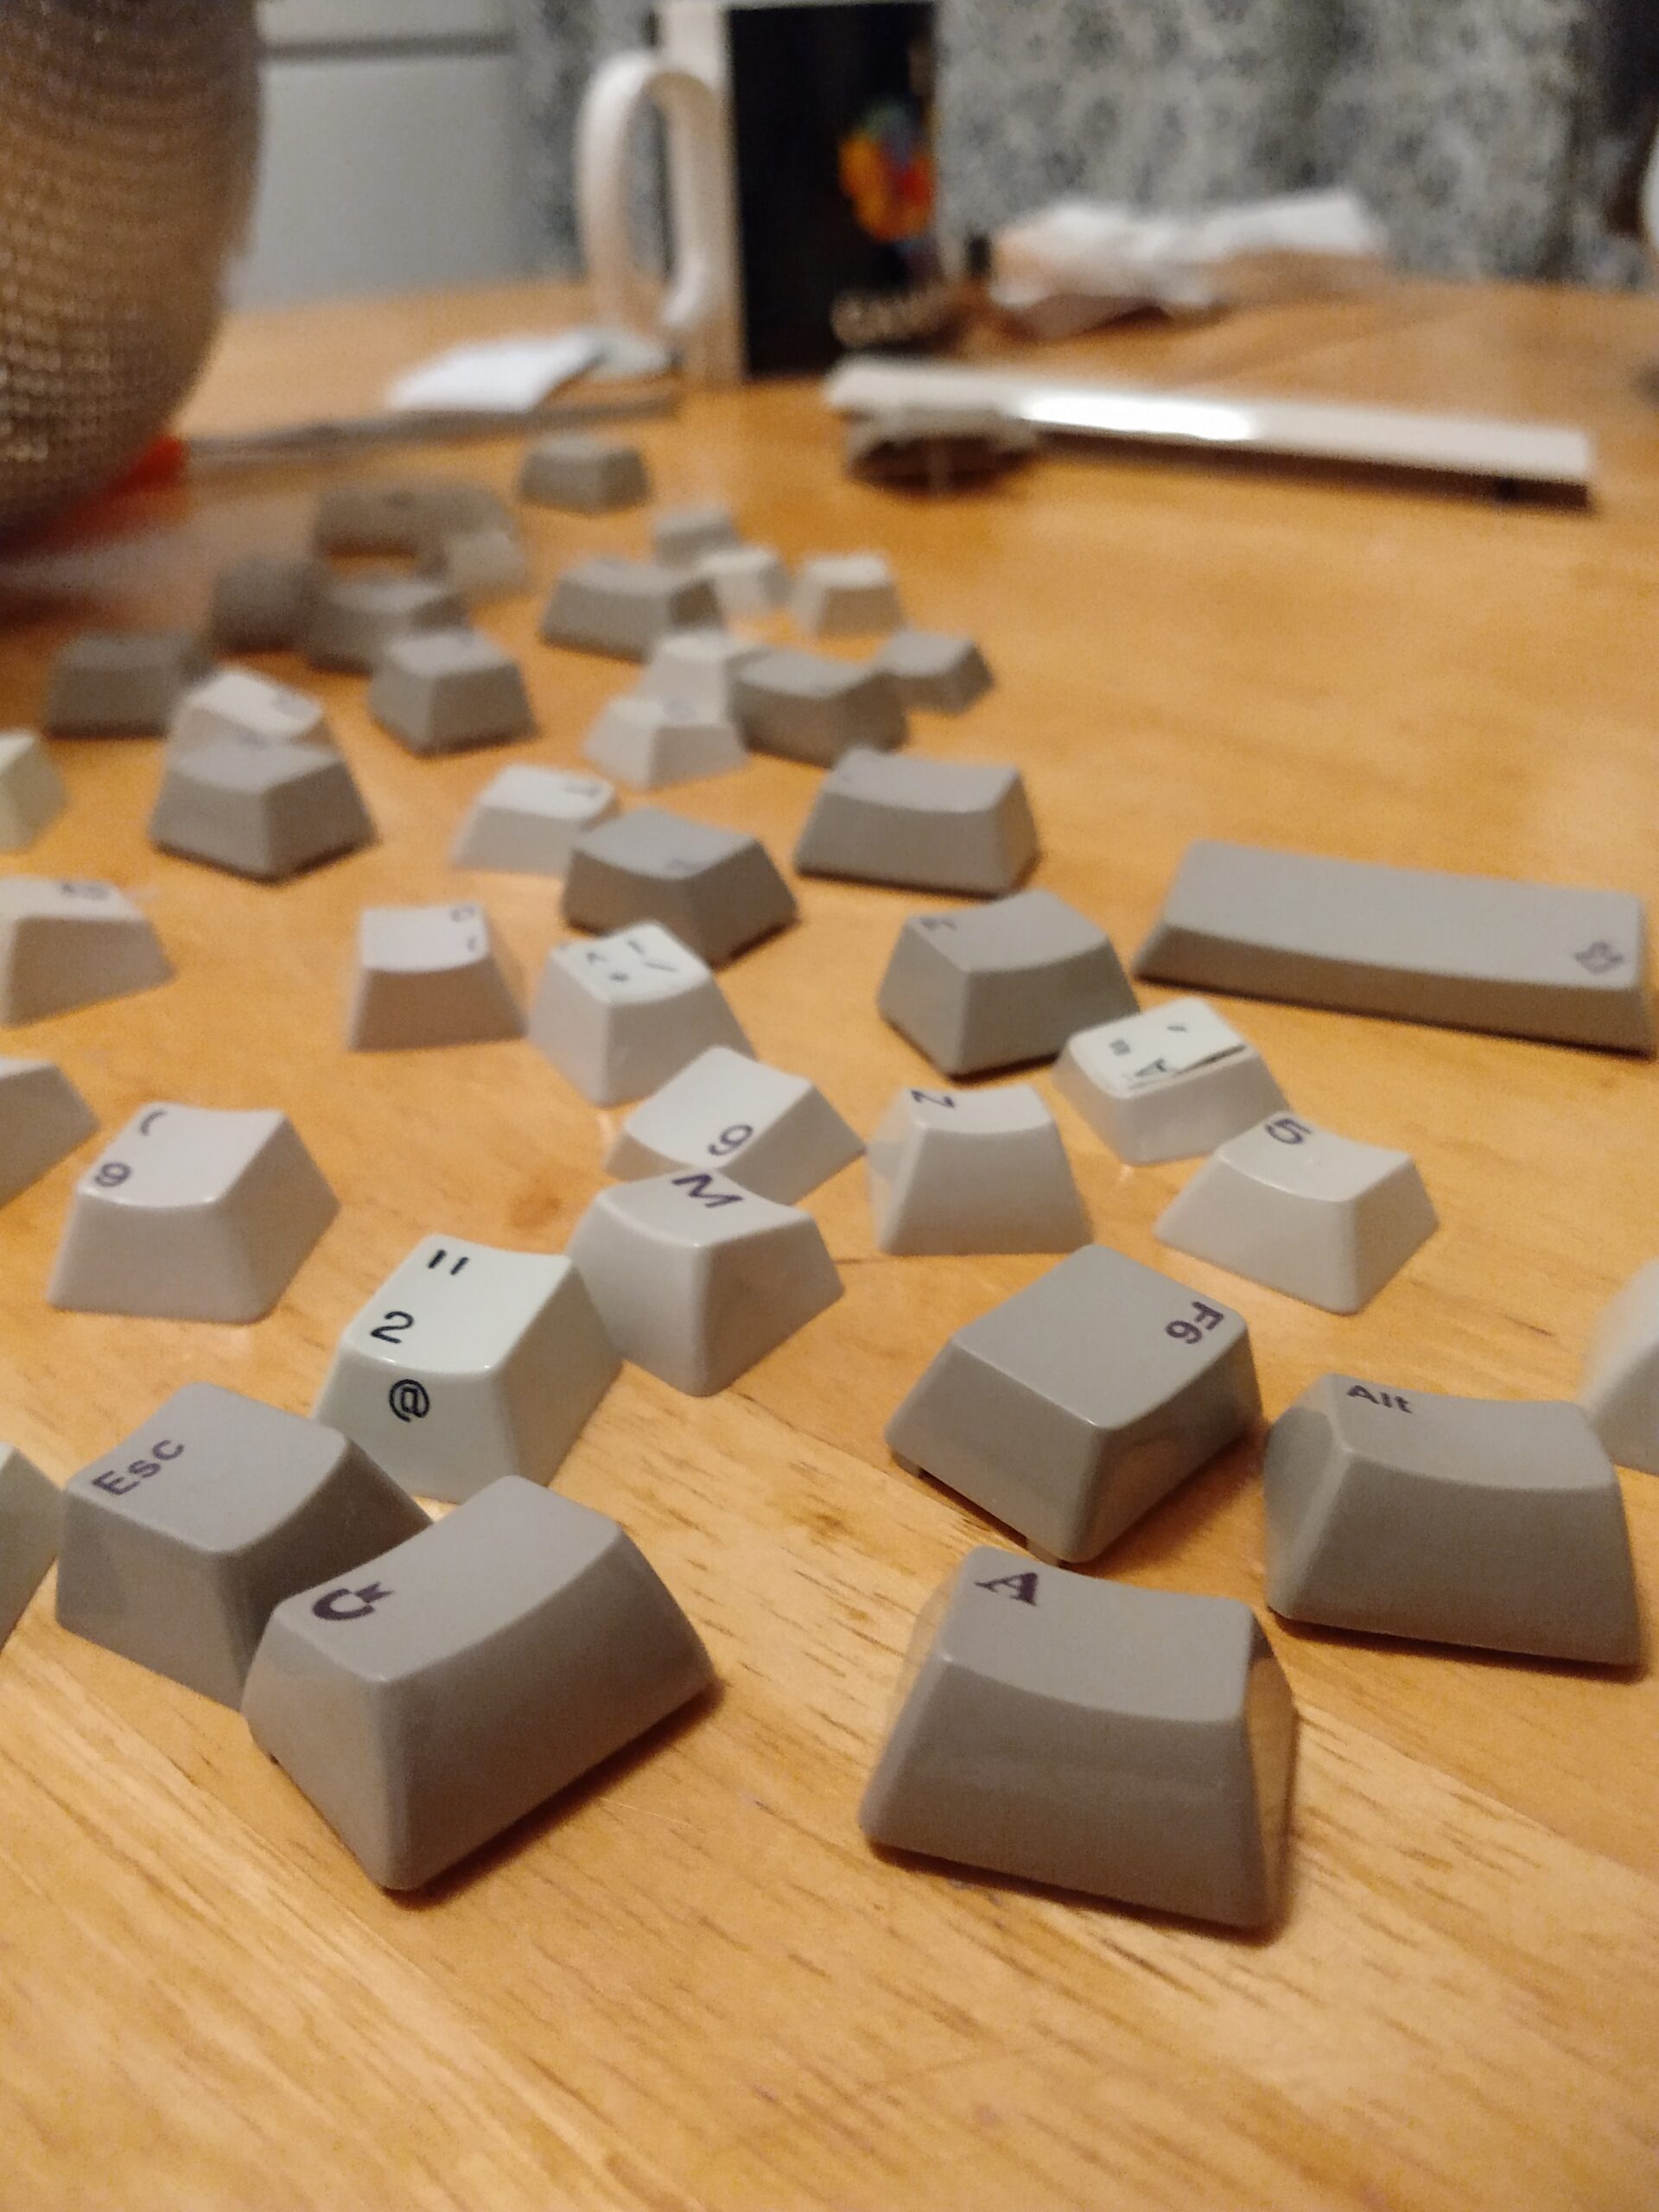
Critically, the space bar didn’t register at all. The space bar! That’s like the most important key. Similarly, the Left Shift as well as the ‘H’ key wasn’t working either. So I began by taking off the key caps for these keys. I really should get myself a key cap remover tool but I just used my fingers and they came off fine. As I started taking them off I thought I may as well take all the key caps off and clean them as well as underneath them if I’m gonna work on this. So I did, and let them soak in some soapy warm water while I tended to the broken switches.
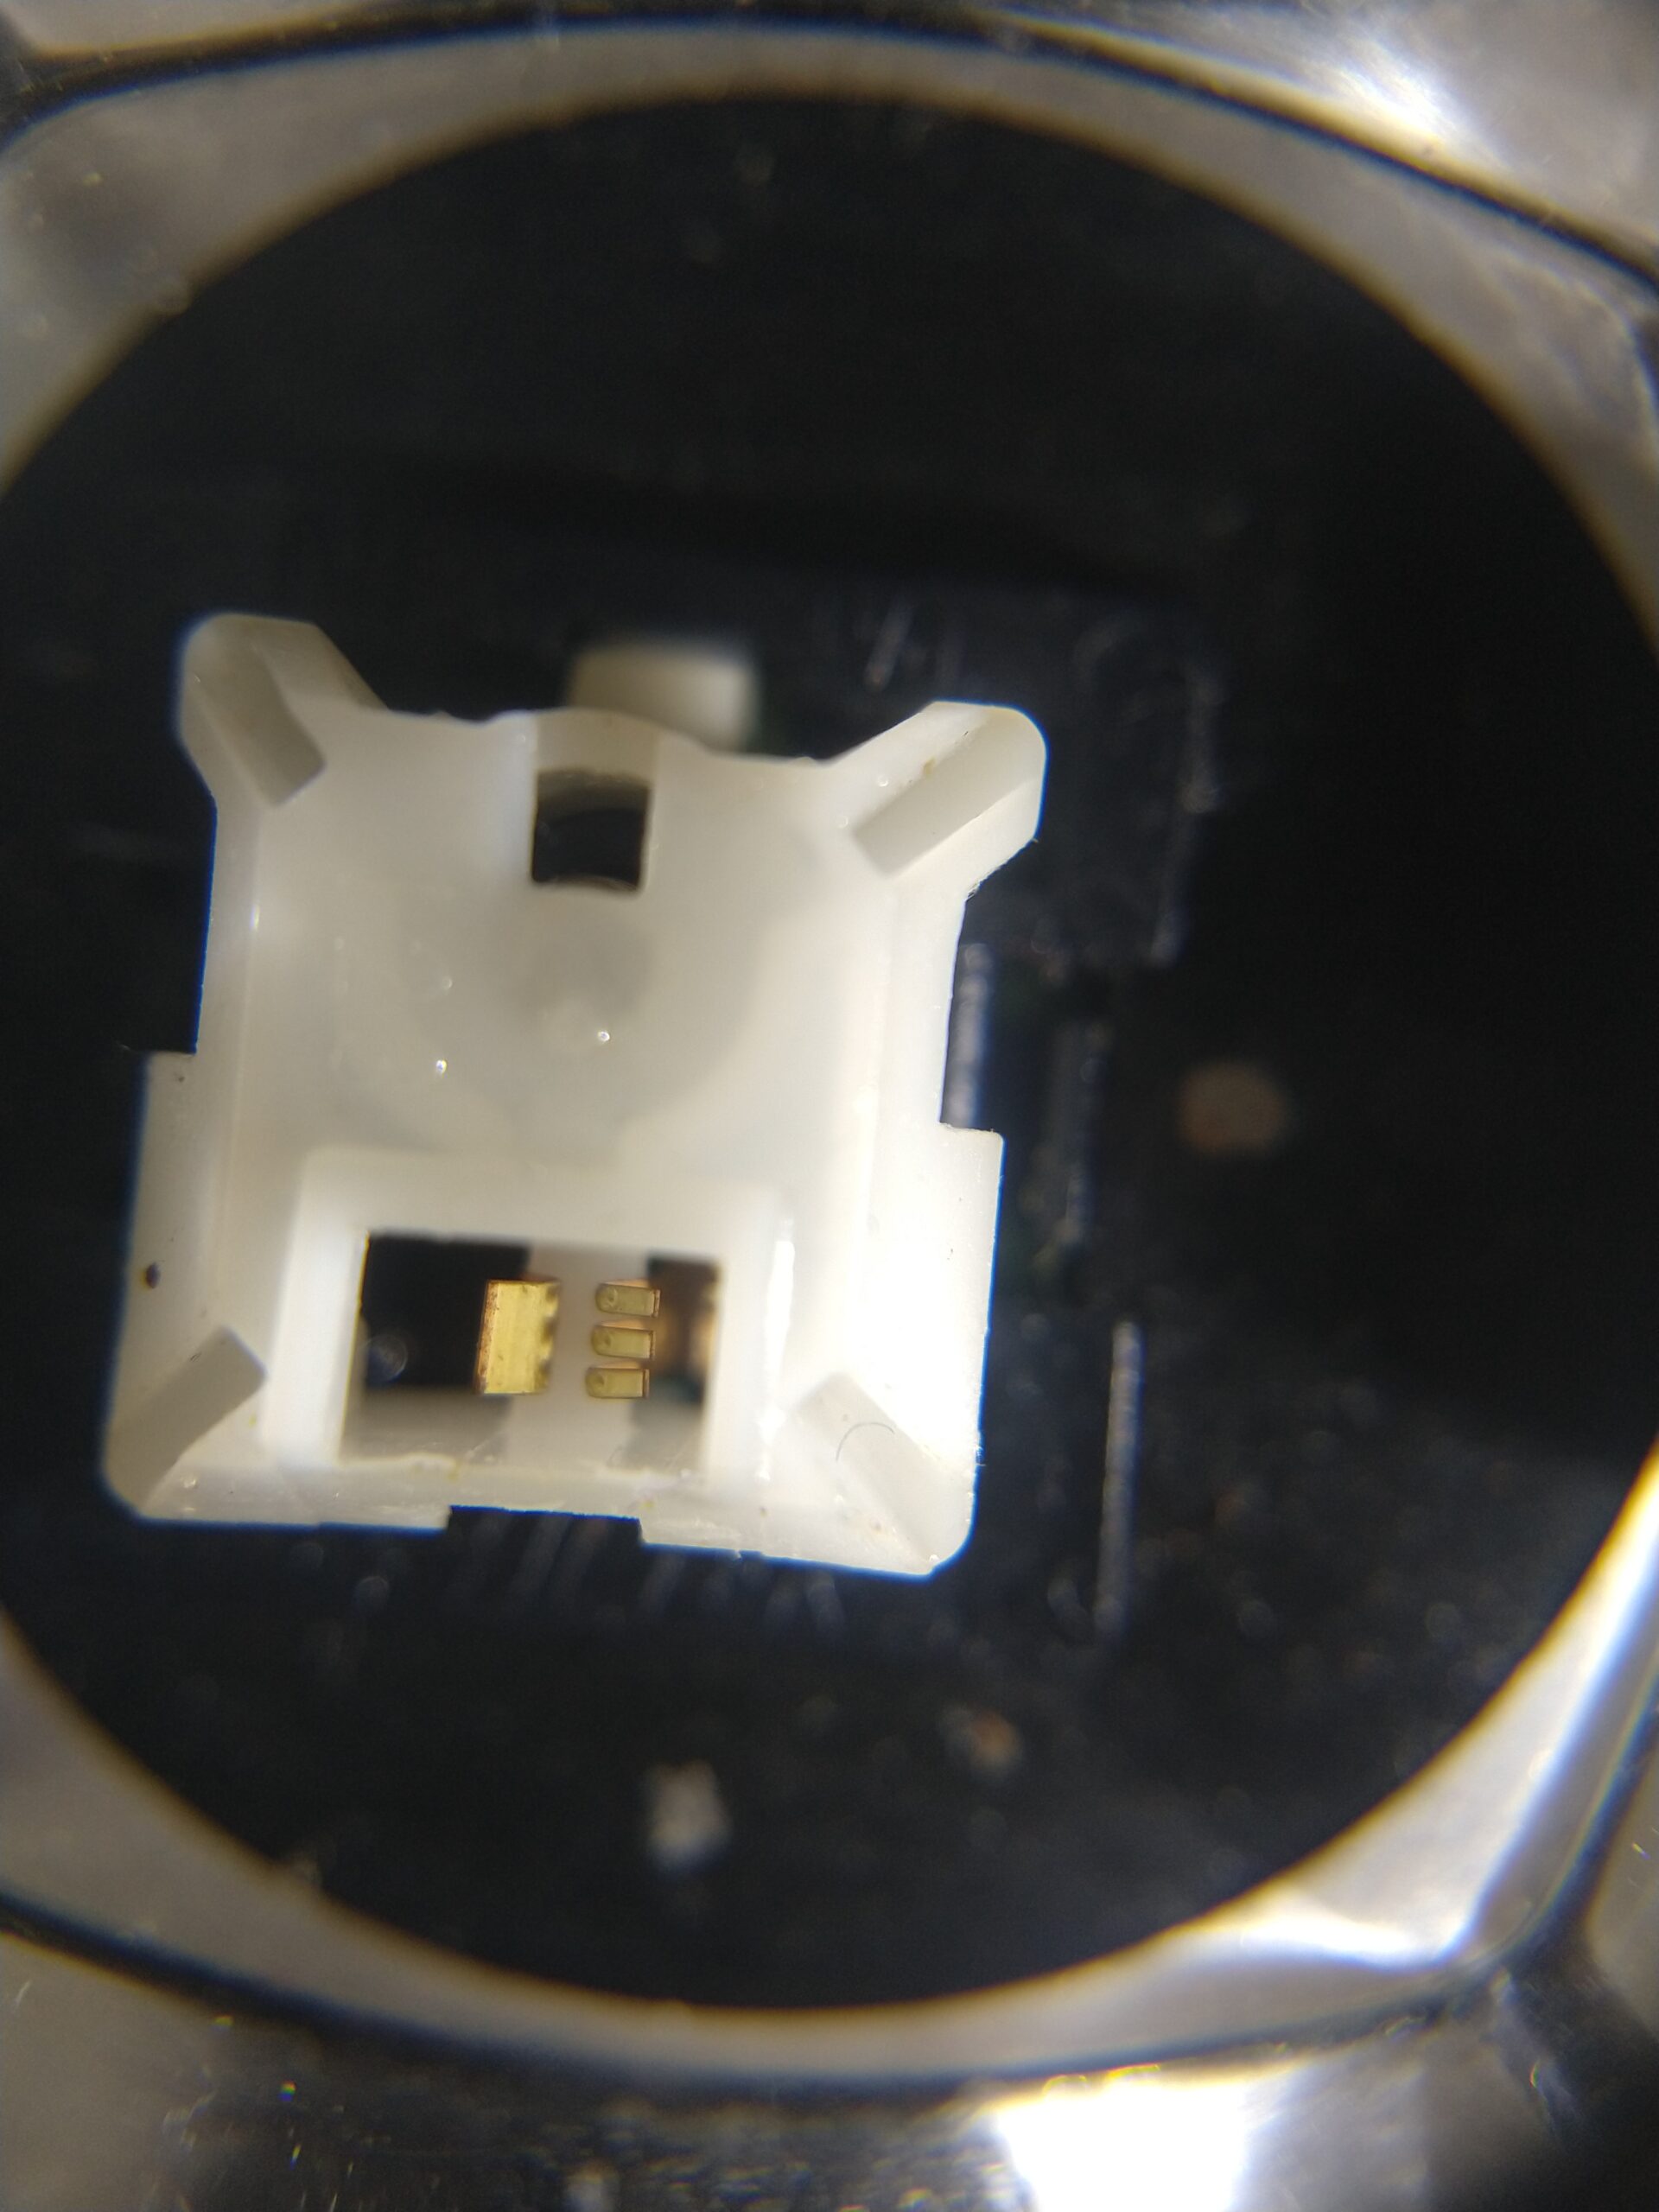
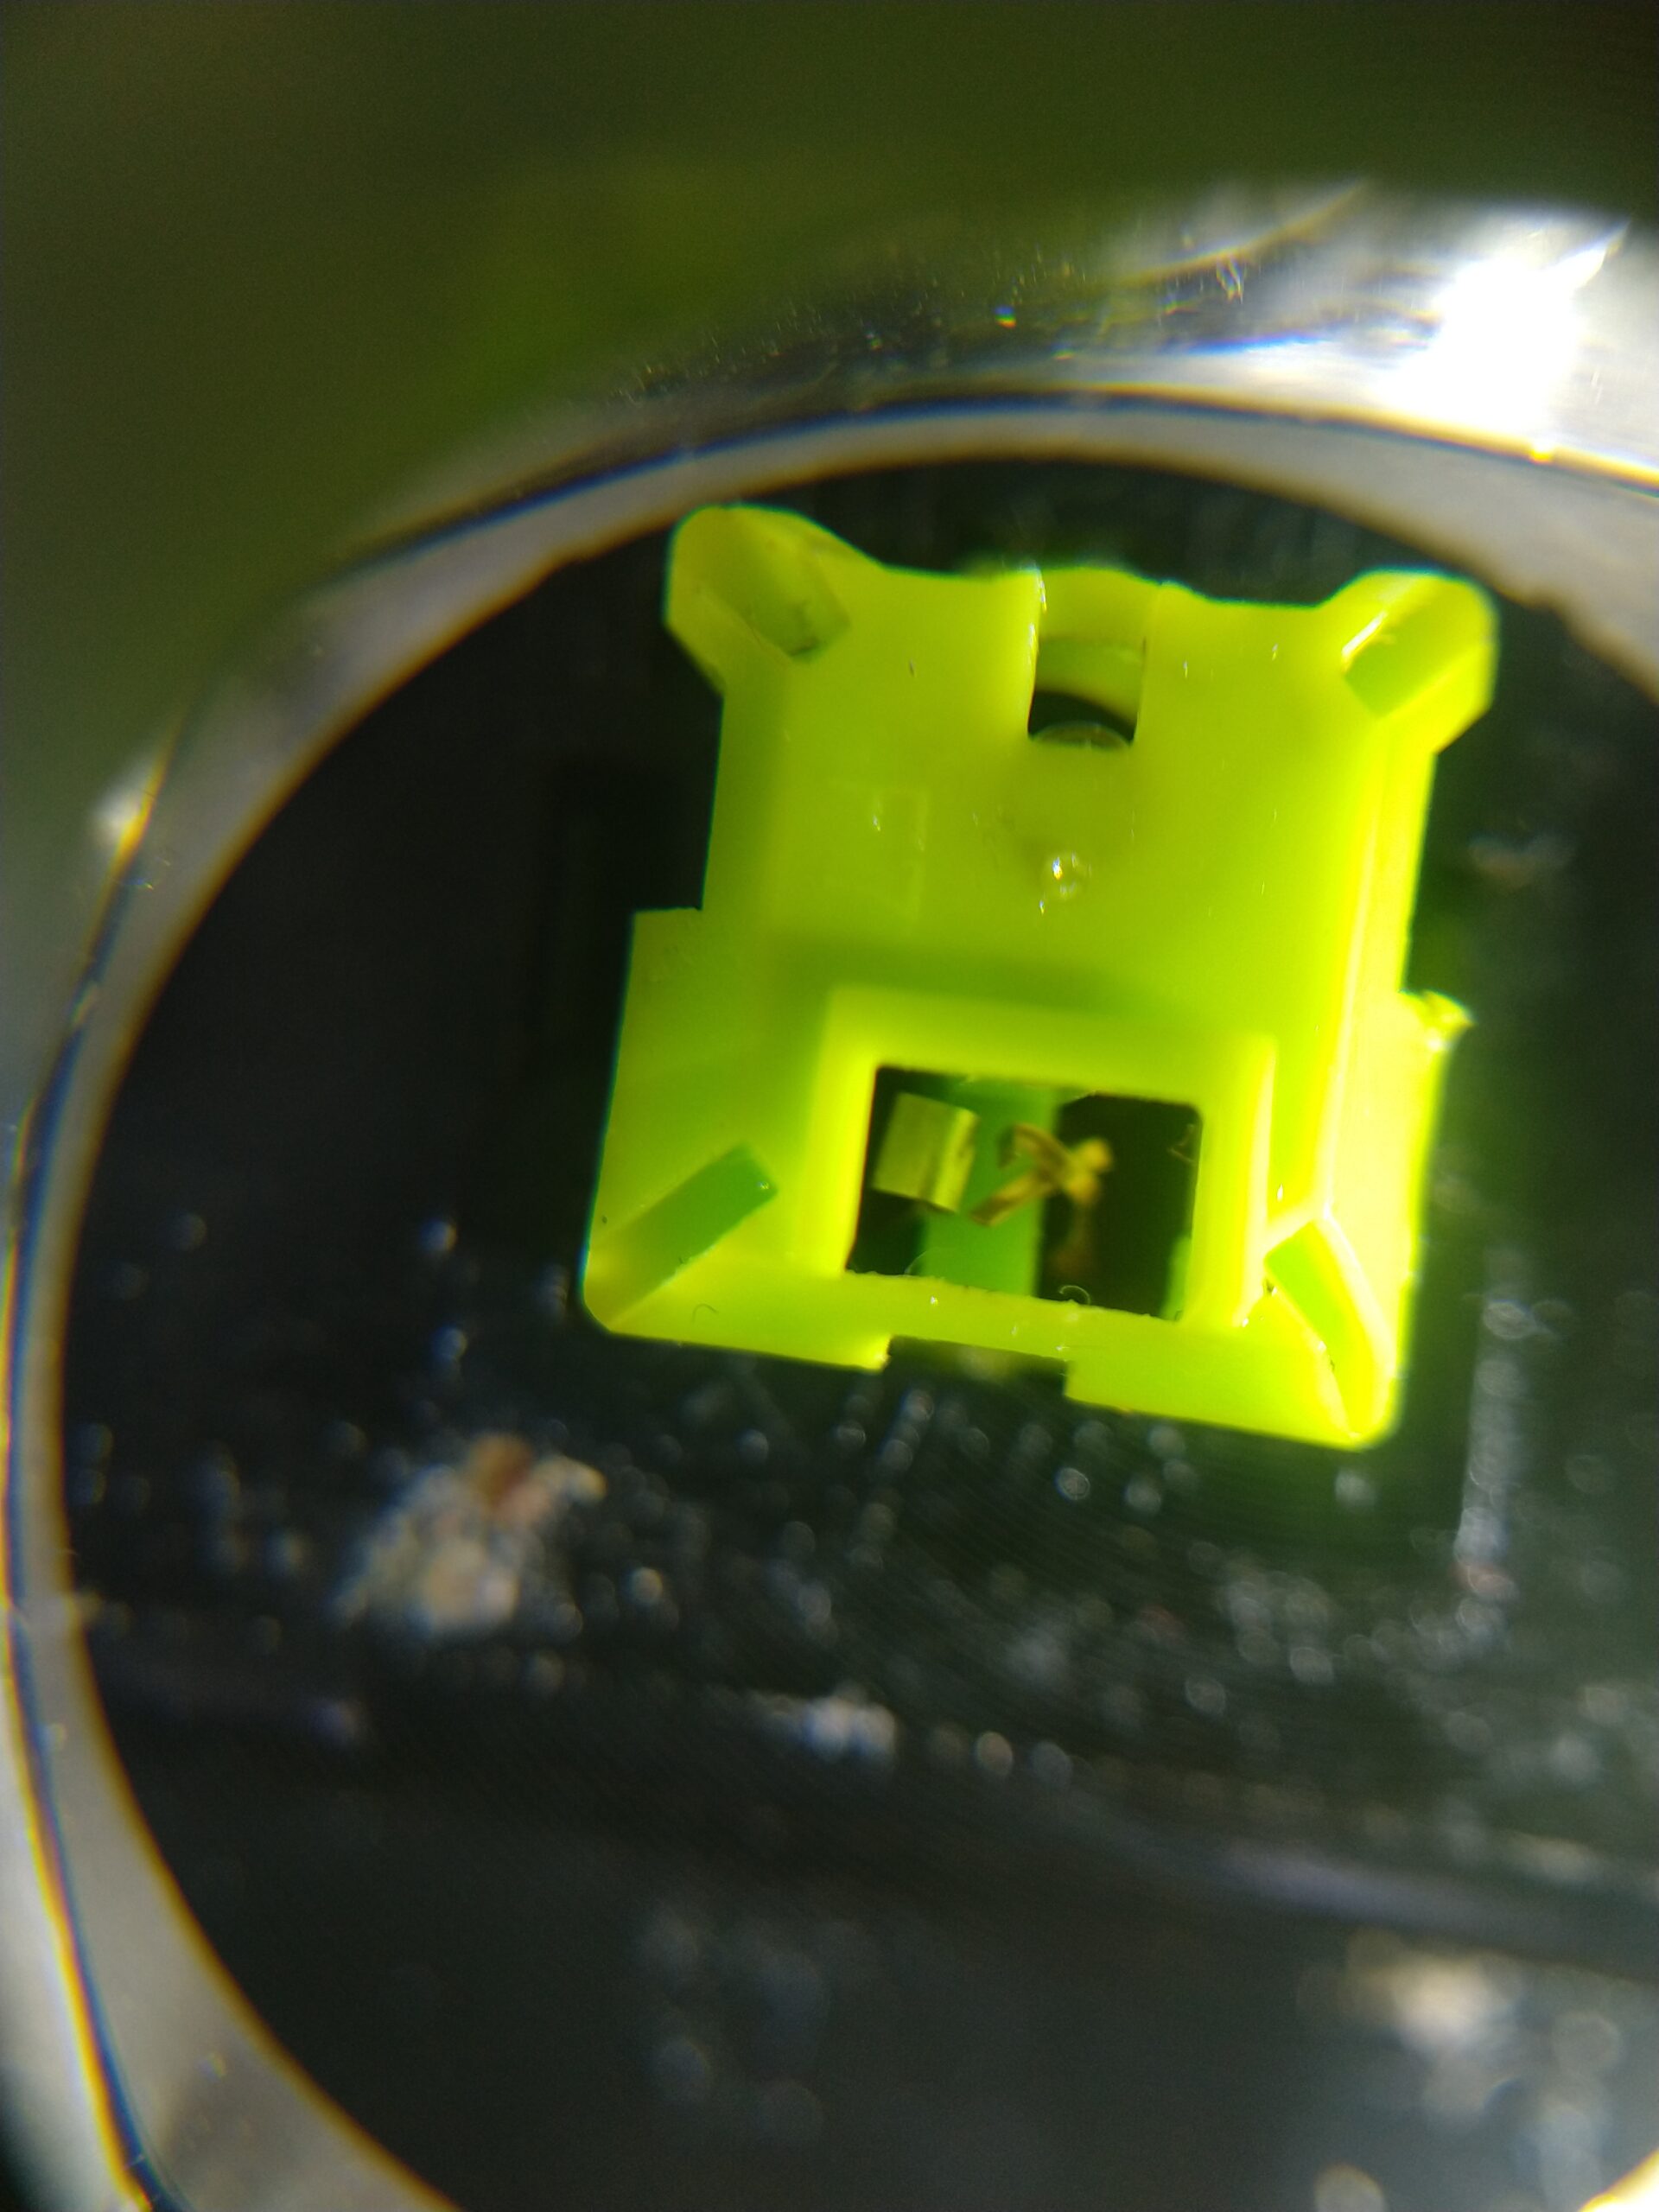
As can sort of be seen in the picture above, in the middle of where the spacebar goes there are some copper pins that are absolutely mangled. They were pushed underneath the switch itself and got crushed. No wonder it wasn’t working. Someone must have taken the spacebar off before on this keyboard and screwed up. For reference here’s a close-up of a working switch:
The switches work by pushing the two copper contacts together when the switch is depressed to close the circuit. On the space bar key the contacts were crushed and bent completely out of shape. So I had to try my best at bending them back into somewhat of a shape, and put the switch back on. After this I did some fine-tuning by bending the top of the pins until they were close together but not touching, while still getting pushed together when depressing the switch. Here’s the result.
It was a similar story with the ‘H’ key, but it wasn’t as badly mangled. Just needed some fine tuning to make them reliably push together again. The switches are now more sensitive than other keys since the contacts get pushed together earlier in the process of pushing the switch down. But it works reliably at least.
The left shift key was a different story though. The left contact was missing completely, and there was just a stump left at the bottom. I had an idea to solder a thin kynar wire to this stump, then tinning the other end and try to bend it into shape. I thought since I have nothing to lose, might as well try it. And to my surprise it worked!
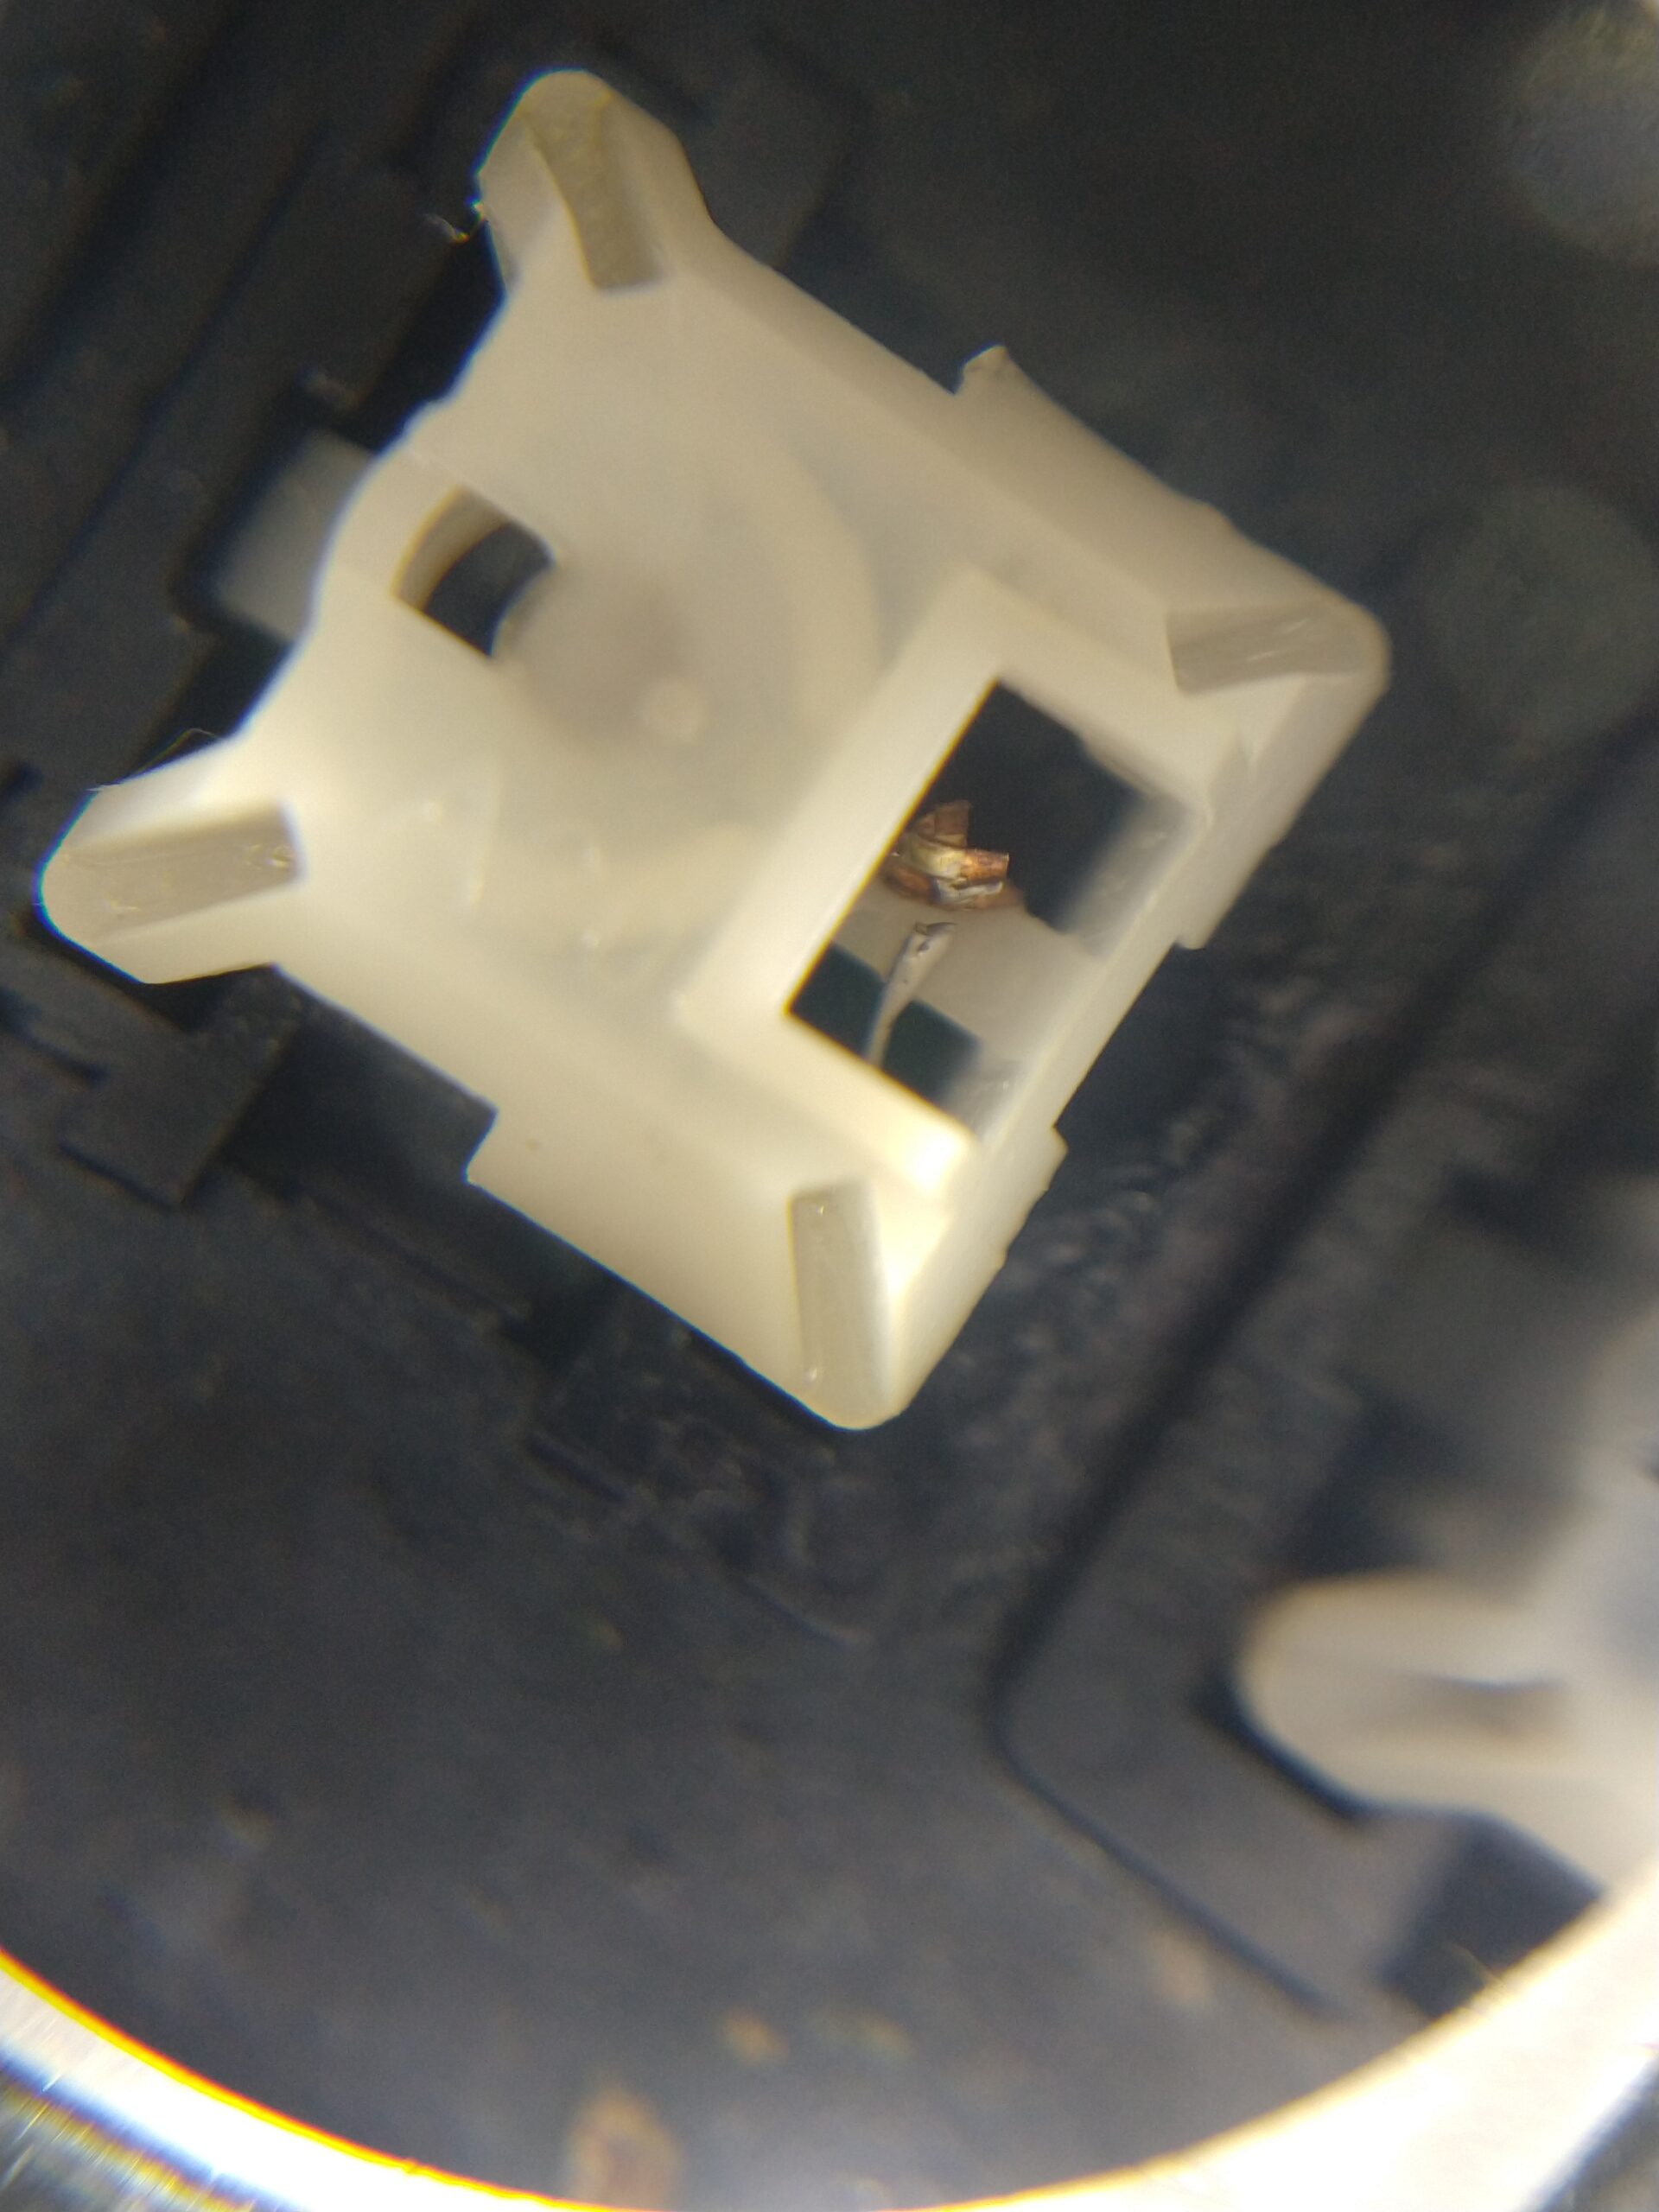
I did accidentally melt a bit of the plastic on the bottom side of the hole the switch goes into with the iron, so it is a bit stiffer now than before. But it is working reliably. So this is a solution if left with no other choice.
I then sprayed some contact cleaner into all of the switches since a lot of them wasn’t making great contact and that helped a lot. So with the switches fixed I tended to the key caps next. The soapy water did a great job of getting rid of all the grime and crap, and I just used a toothbrush to clean the key caps further under some running water. Then a towel to dry them off.
This keyboard has a Swedish layout. And interestingly the Swedish-specific keys have had sticky labels applied to them with the lettering rather than having actual printed letters. This can be seen slightly on the ‘Ä’ key just below the shift key in the picture above. Other Swedish Space Invaders keyboards I’ve seen pictures of seem to have properly printed Swedish key caps.
Another issue this keyboard had was that someone, it might even have been me at some point, had pushed the disk drive LED through the solder points and damaged some pads and traces underneath, likely when closing the top half of the case up. The result was obviously that they LEDs weren’t working properly. I resoldered these pins and added a bodge wire for the trace that wasn’t connected anymore. Now the drive LED is sturdy and works perfectly again.
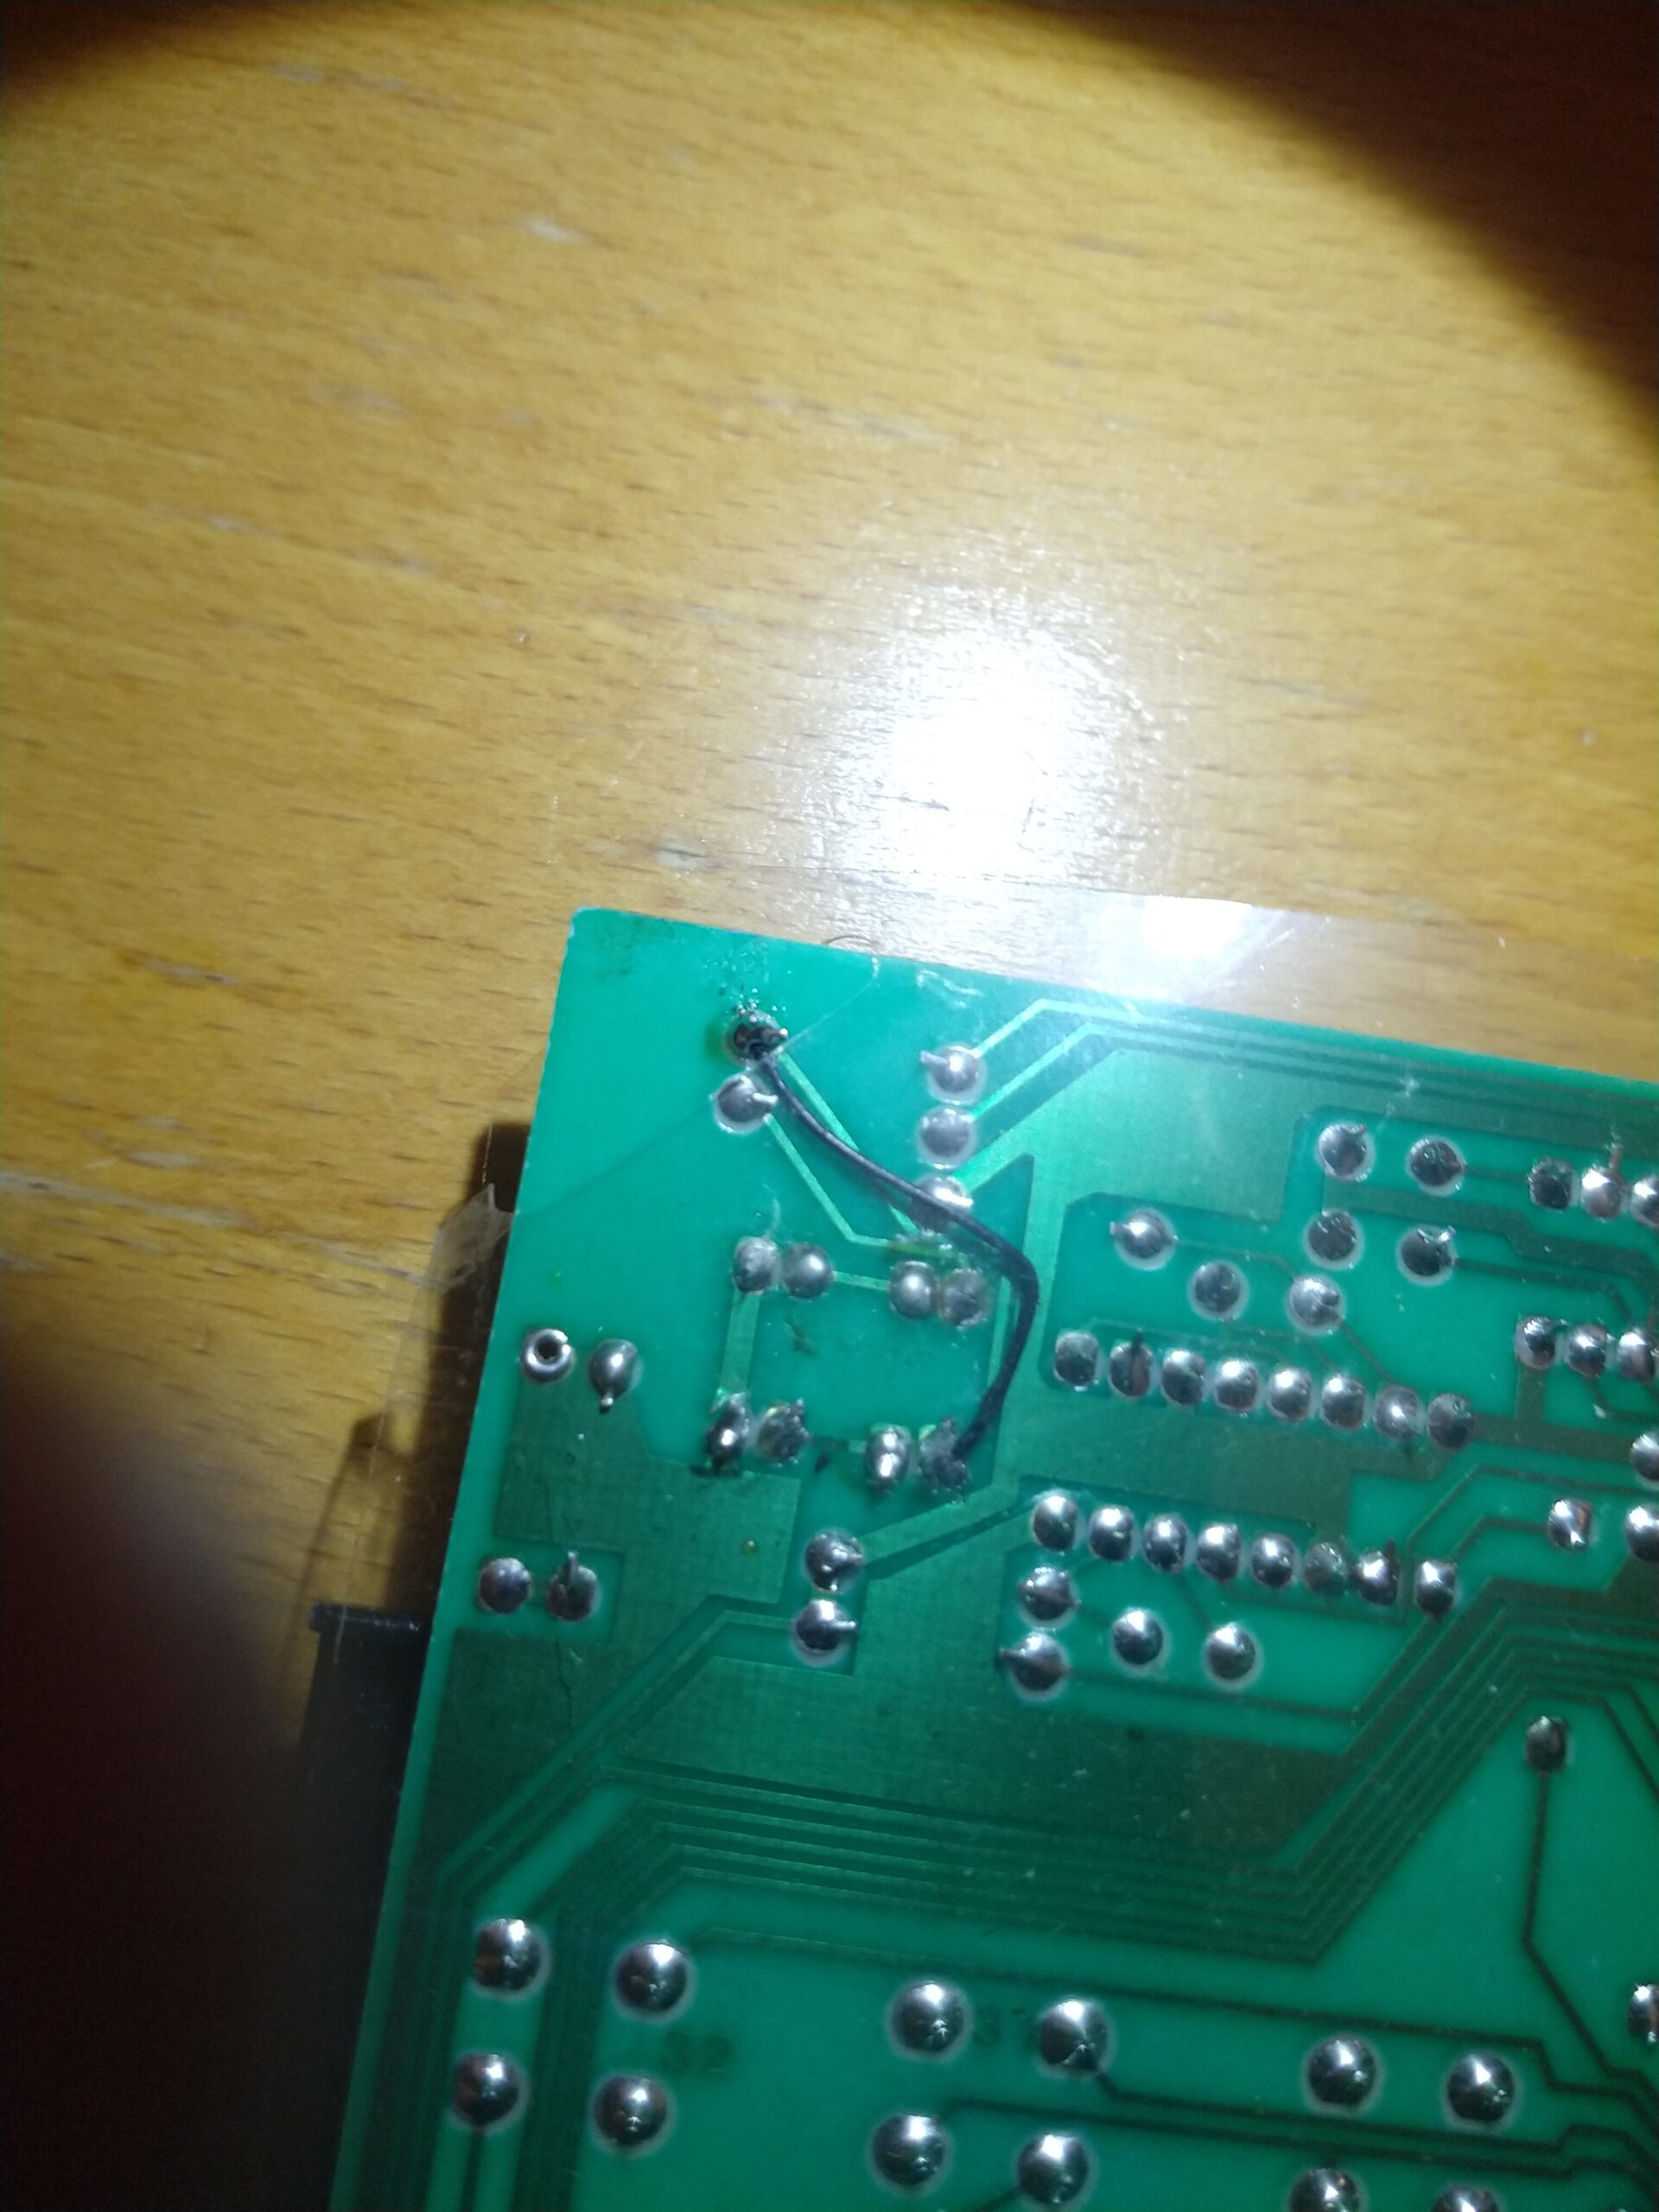
As if this wasn’t enough, the act of me moving and flipping the keyboard around caused some of the wires going from the PCB to the connector to come loose. So I cut them off and resoldered all the wires back again. I noticed this because I wasn’t able to reset the Amiga anymore with the Ctrl + A + A key combo, meaning the reset signal wasn’t making it through.
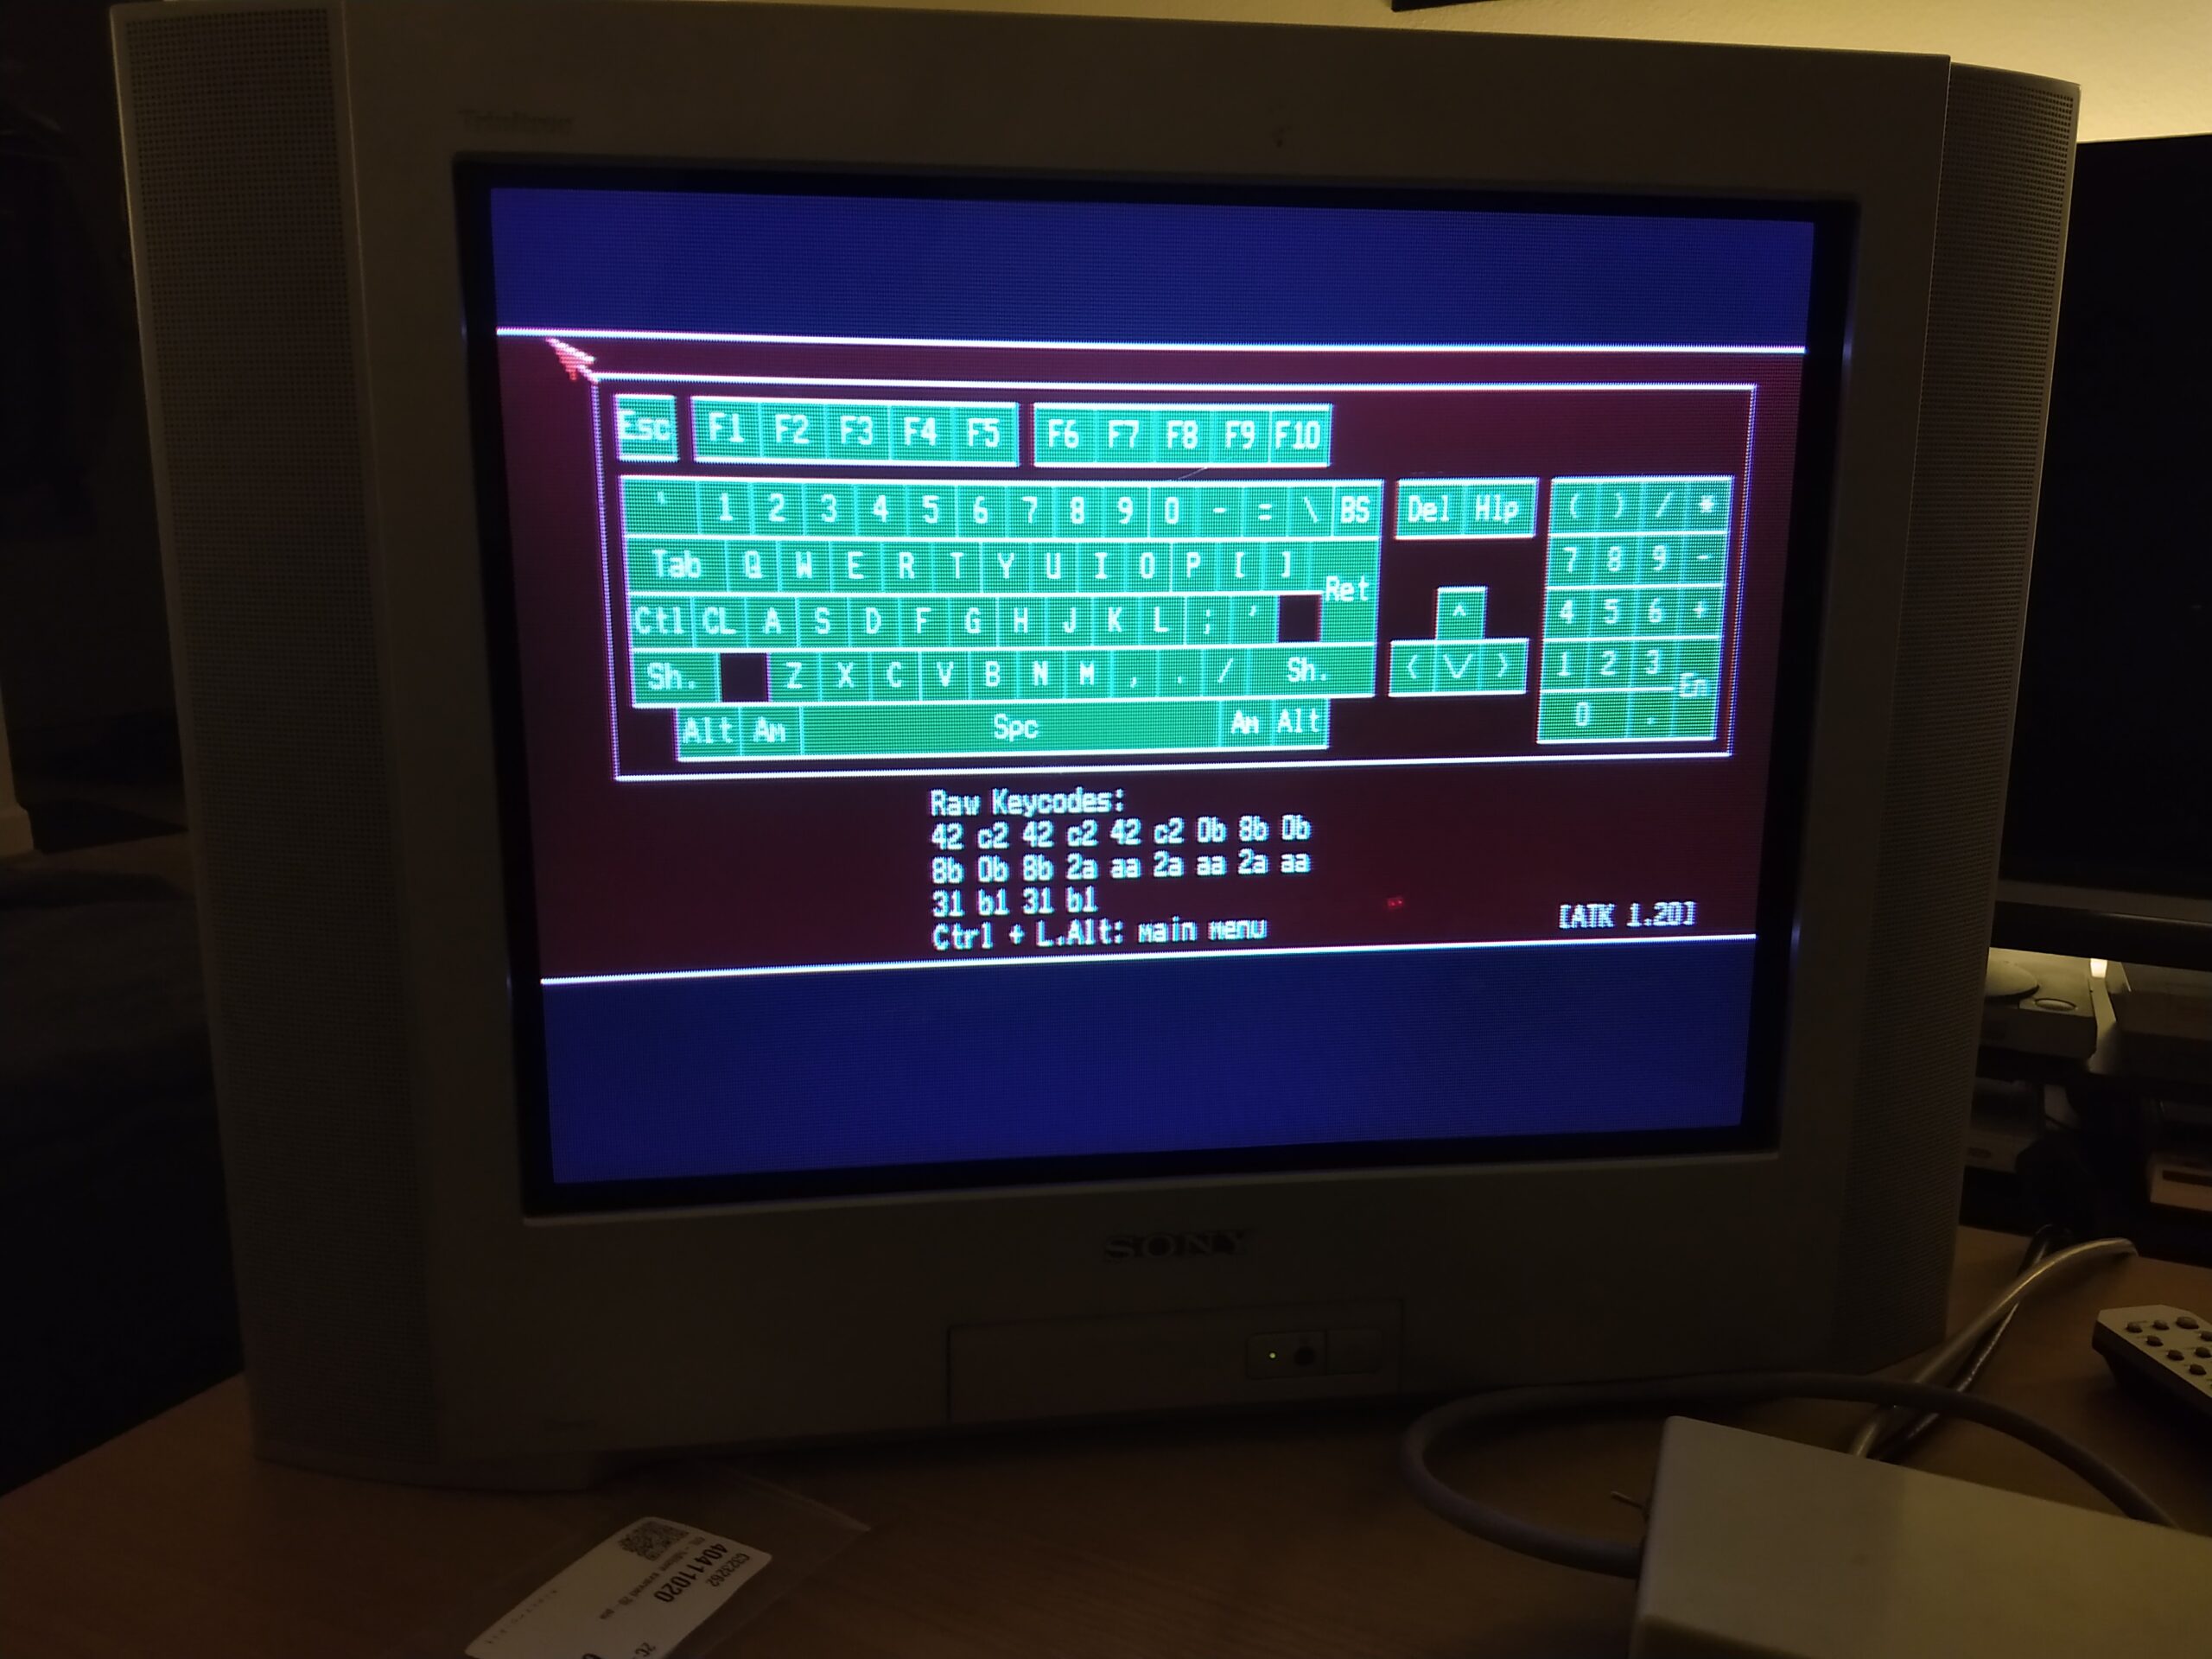
A final test of the keys using Amiga Test Kit showed that everything was fine once again. Then the only thing left to do was to reassemble the computer.
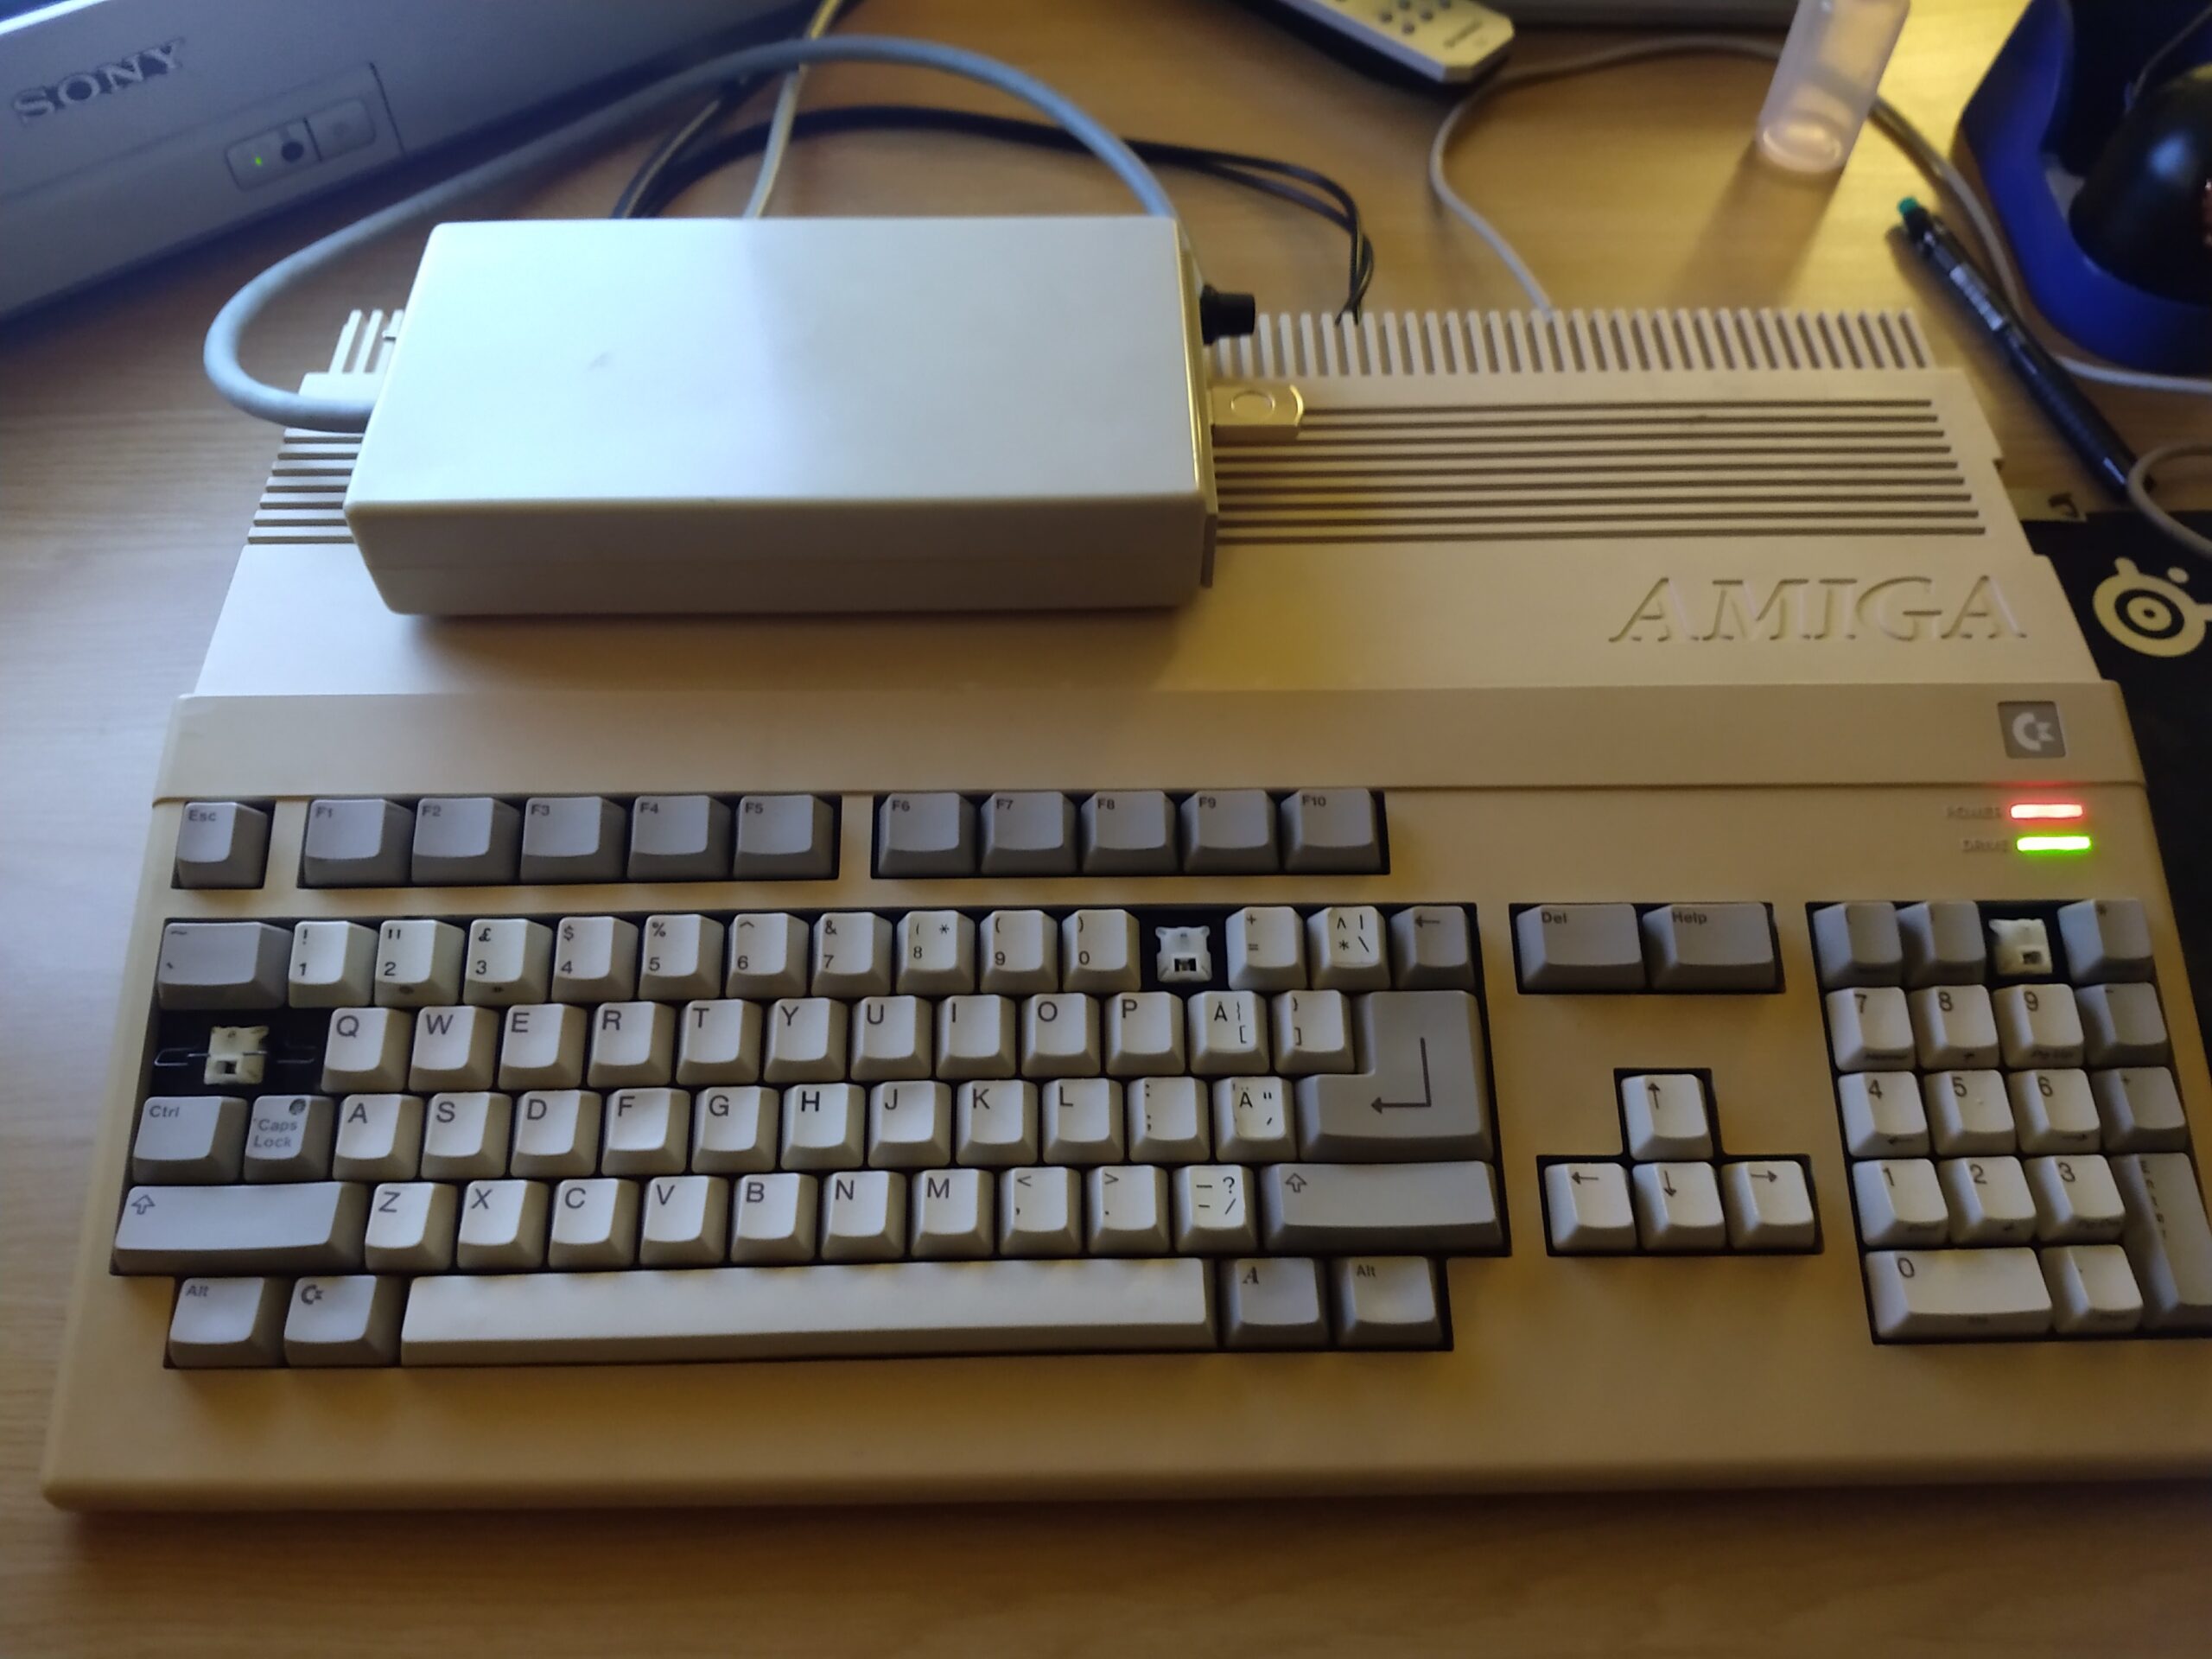
Much better. The only downside to this is that now the keys are so clean looking that it makes the Amiga itself look yellow as hell. But I’ll gladly take that over the previous state of the keys. I have read that the key caps on these Space Invaders keyboards uses a plastic that doesn’t yellow with time, and it does appear to be true. Maybe I’ll do some retr0brighting on the case at some point.
There are some key caps missing as you can see. They were missing when I got it already. If the dirty keys wasn’t enough of a hint, that should have probably been a sign of the state the keyboard was in and how it had been treated. I’m hoping that I might be able to find replacements for them at some point but we’ll see.
Links
- Walkthrough: The Amiga 500 “Chicken Lips” – Some info and a video about the so called Chicken Lips Amigas at English Amiga Board.